Running Along Behind
- Sarah Fielke
- Aug 1, 2024
- 4 min read
Hello Smites and I hope you’re all well and happy! The past few months have just been bananas for me, and to top it off last week I had to have an unexpected follow up procedure to my surgery that knocked me a bit flat. Sorry I haven’t been able to make the load of star blocks for our colour exercise that I promised just yet, but I did get one done and I plan to do a lot more. At least I can show you how to make yours!

The nice thing about this block is that is can be as large or small as you please. I’ve cut my triangles at 2 1/2” using my half square triangle ruler (which is available here), but you can make yours any size you like. If you are using the ruler, you cut your strip to the finished size of the square (in my case, 2”) and then add 1/2”. So 2 1/2” strips.
Place the ruler onto the strip with the 2 1/2” mark at the bottom of the strip, and the flat end of the ruler at the top of the strip.

Square the side up, then cut the triangle. I am cutting these here from two layers of fabric.


To cut the next triangle, simply turn the ruler upside down, so that the flat top is at the bottom and the 2 1/2” mark at the top. Don’t flip the ruler over to the back.
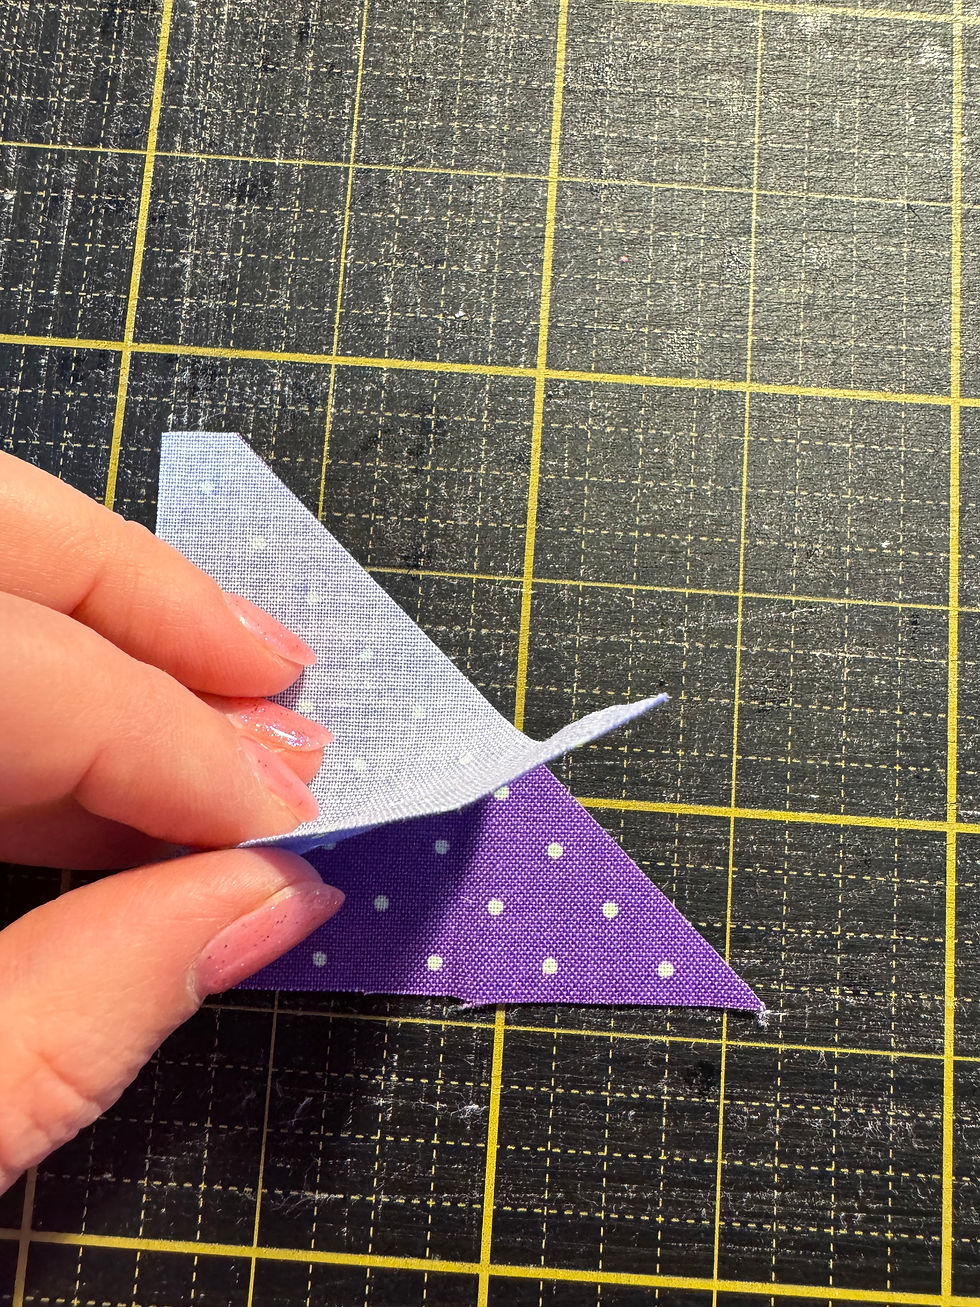
If you get really fancy, you can put the two colours of triangle you’re cutting right sides together, and cut the triangles in pairs from the strip. Then you have the triangles ready to take straight to the sewing machine and stitch into pairs!

The short, flat top edges of the triangle should align, because then you have your quarter inch seam start all ready for you.

If you ARE NOT using the ruler, you need to add 2 7/8” to the finished size of the square - so in my case, 2” finished would mean a 2 7/8” strip. Cut 2 7/8” squares from the strip, and cut the squares in half on one diagonal to get your triangles.
The block is 4 squares by 4 squares - so my block with the 2” finished squares, ends up 2” x 4 - 8”, plus the half inch for seam allowances, 8 1/2” when sewn. If you use 3” finished squares, 12 1/2”, 4” squares, 16 1/2” and so on. You could even use 1” finished squares and end up with. Teeny 4 1/2” block if you were so inclined.
I kind of like an 8 1/2” block, it seems like a sensible size for both the triangles and the finish. You can always set the stars with other things, and its divisible x 2 which is handy if you’re wanting to make different blocks and seem them all together. So 8 1/2” it was for me.
When you have stitched the pair together and ironed them open, clip the little ear off the edge of the square to allow for neat and tidy piecing.


Lay the pieces out again in the order they need to be stitched - its really easy to get these out of order, so laying them out is an important step. Stitch the squares together in rows, nesting the seams on the triangles as you do. I press my seams to the side - I’m not a believe in open seams one little bit I’m sorry to say - and here I have always pressed with the up and down sides of the seams in mind, so that they are easily and neatly nested together.

And here is my finished block! Its purples, mixed with a mint green and the pale yellow pieces for contrast on the colour wheel.

I’m going to make others in similar colour ways, but with sharper contrasts with the colours. Some will have more predominate yellows and oranges, and some will be more purples.

The Big Woods Block of the Month started today, and as I was packing up my little appliqué blocks for the “extras” applique on Month 1 the little birdies fell next to my star block. You never know, maybe I’ll design some applique to go with these stars and make a little lap quilt from it all.

As a treat for being so lovely, here’s a little Stitchy Mites preview of the “extra” project for Month 2 of Big Woods. We are stitching the Owl block next. He is a librarian, and he likes to stay up late, reading and drinking dirty chai. He needs his glasses for that, so there will be optional glasses to put onto the quilt - but also an extra pattern for a little library book bag with him stitched on the side, in case your quilt doesn’t have glasses but you needed to make some anyway. Isn’t he gorgeous?? Plus my Tabby Road stripe arrived JUST in the nick of time to be the background. WINNING :)

Sarah x

Comentarios